At this point, we have:
1) A temporary binder that’s keeping all of our accumulating paperwork under control
2) Our new binder with pretty cover & spine in place
Now, let’s move on to Part 1 of planning our week. I’ve done this a few ways.
Make a Household Planner Notebook Weekly Plan Option 1:
“AT-A-GLANCE Planning Boxes”
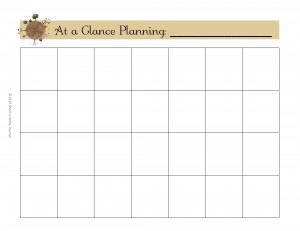 This is a quick visual way to plan out the different aspects of your week. I preferred to print out the page that had 4 boxes down and 7 across. Obviously, the 7 boxes going across were labelled with the days of the week. The four going down were labelled with the main areas of my day and what I needed to remember or remind myself to do:
(Row 1) Personal: Quiet Time, Type of Exercising, etc.
(Row 2) Meal Planning
(Row 3) Type of Day/Routines to follow: School, Work, Errand, Cleaning, etc.
(Row 4) To-Do List
Make a Household Planner Notebook Weekly Plan Option 2:
“AT-A-GLANCE Weekly Pages” (various themes available)
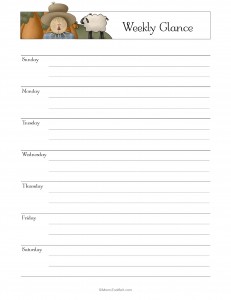
This page is already divided by days for you and gives you more of a “journaling” style of planning your week.
Make a Household Planner Notebook Weekly Plan Option 3:
“AT-A-GLANCE Weekly Planner Pages – 2 page spread” (various themes available)
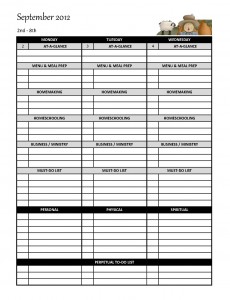
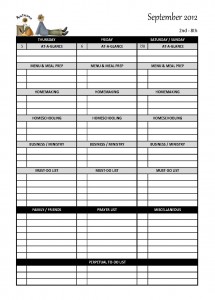
This is DEFINITELY my favorite option and the one I’ll describe in detail from my experience. You can record TONS of information about your week in a super-organized fashion. Plus, these pages are completely editable so you can type your own headings, change the colors, fonts, type in your information, etc. Now that I’m pretty decided on the headings I like to use, I print out a month’s worth of these pages at a time with the basic info typed in.
For this How-To, I’m just going to describe the types of headings I use when planning my week. The next How-To will explain my actual planning process in more detail.
Below are the headings I include for each day. When editing the form, I choose one color for each day’s headings.
(At-a-Glance)
This tells me what sort of routine I’m following that day. Typically, I have ALL SCHOOL, ALL WORK, SCHOOL/WORK, SCHOOL/ERRAND, CLEANING, etc. I can quickly see without the clutter of all the details what my day entails.
(Menu & Meal Prep)
This is pretty self-explanatory.
Side note: I do a big grocery shopping 4 times a year (one for each season). So, I have 3 months worth of menus planned out ahead of time. HUGE timesaver for me! Once a week, I go to the grocery store for perishables and large items we cannot store for 3 months. More on that another time … my point, you can EASILY plan a 1 week menu and it will save you so much hassle when it comes to dinnertime each day.
(Homemaking)
Here I list any (non-daily) homemaking type tasks I want to do that day.
(Homeschooling)
This is not the place to put my entire daily routine & schedule. Instead, I list big prep things I need to remember like: read history notes, renew library books, watch videos, etc.
(Business / Ministry)
This is just for the highlights of that particular day’s tasks.
(Must-Do List)
I list appointments, phone calls I need to make, and any other BIG must-do’s that are not listed elsewhere.
The rest of these headings are not included as part of any particular day. So, when editing the form, I give these headings a completely different color from the rest already used. These headings describe the areas of my life I review each day to remind me of my goals and “big picture” type projects & to-do’s.
(Personal)
(Physical)
(Spiritual)
(Prayer – kids)
(Prayer – family & friends)
(Prayer – other)
(Perpetual To-Do List)
I pick up to 18 items from my perpetual to-do list that I want to “try” to accomplish this week. No pressure and no guilt if I do not get to them. I can add them again next week.
In addition to the Weekly Planner 2 Page Spread forms, I also use the “Weekly Planner Pages – Inserts” and a our “Daily Do-List Insert” (more on those later).
Coming up next:
I will walk you through organizing your daily tasks and routines so you will be ready to make a weekly plan.

